Showing posts with label Army Lists. Show all posts

Wednesday, August 2, 2017

Carnage Cup 2017 Blood Bowl Tournament AAR

I spent most of last weekend at a local Blood Bowl tournament. There were 5 rounds in total, 3 on Saturday and 2 on Sunday. The OFCC Carnage Cup is a two-day, resurrection Swiss style tournament.


Teams were built with 1.1 million gp, plus a skill pack of 6 normal skills. I chose to play Khemri, but did not have a team built, nor any appropriate miniatures.


So I chose to scratch-build/kit-bash a team. As I typically do, I started with the name. My teams are always based on, or inspired by NFL teams. This is an important first step as it defines my color pallet.


This is the entire team as brought to the Carnage Cup, including staff/markers.


  • Back Row, Left: "Spirits" representing Re-Rolls in the tournament and Cheerleaders in leage play. They are all translucent green Reaper Bones figures.
  • Back Row, Right: Tomb Guardians comprised of Crypt Horrors with Ork heads and 1K Sons Helmets & shoulder pads, and Necron groin guards.
  • Middle Row, Center: The Coach flanked by 2 mummified Assistant Coaches--Used as Turn/Score markers in the tournament.
  • Middle Row, Left and Right: 4 Skeleton Linemen comprised of various skeleton bits, Necron heads, and Dreamforge Stormtrooper shoulder pads.
  • Front Row, Center: Ithica Benoin from Willy Miniature.
  • Front Row, Left and Right: 2 Anointed Blitzers made from Skeleton Warriors, Kroot shoulder pads, and 1K Sons helmets.


The remaining members of the team no used in the tournament. There are 6 additional Skeleton Linemen and 2 Anointed Throwers. The Throwers are made from Skeleton Warriors, Kroot shoulder pads, 2e Blood Bowl balls, and 1K Sons helmets.

That's enough explaining, lets move on to the After Action Reports.

Game 1 vs Skaven


I really struggled handling the speed of the Skaven. They were easily able to circumvent my defense. No matter how I screened my ball carrier, there was always 1 rat that could throw a Blitz. The Skaven team did not have a Rat Ogre, but they did have a voracious Linerat with a Claw--He caused some damage.

We ran out of time to finish the game (2.5 hour time limit), but I managed to score a last minute TD seconds before the round was called.

Results: Rats win 3-2. The Skaven with the claw kept casualties even at 4-4. Of the casualties received, 2 were Tomb Guardians, plus a Lineman and a Blitzer. Fortunately, both Tomb Guardians Regenerated.

Tournament Points Earned: 0

Game 2 vs Orcs


In the first half, things were looking good. The Orc Chainsaw was not performing well and I had kept the green skins from scoring. But on turn 6, I over committed to one side setting up a play for stealing ball. Unfortunately, I unknowingly exposed the other side to a pass, hand-off, and 2 GFI TD. The remainder of the half was spent bashing as many orcs as I could.

We went into the second half up by 3 players and receiving the ball. I had to burn both my Re-Rolls on the first to turn to prevent early turn overs. Then on both turn 3 and 4, a Blitzer (with Frenzy) rolled double Push followed by a Skull (Attacker Down) leaving me in an unfavorable situation--Twice!. That cost me dearly as my Star Player ball carrier was Blitzed, Killed, Regeneration failed, and ball run in for a TD. I was dominating the second half, but those 2 bad blocks cost me the game.

Results: 0-2 Orcs. However, I cut through AV9 Orc armor like butter--final casualties were 5-2 my favor.

Tournament Points Earned: 1

Game 3 vs Chaos Dwarves


I have played this coach 3 times in league Friendly games, and lost all 3 times. However this time he was playing Chaos Dwarves--A team I am quite familiar with.

The game was the most tedious grind fest I have ever played. We both shut down each others offence to a stand still. Ithica was Blitzed and killed again (failing Regen again too) in the middle of the first half. But this time he was able to Dump Off the ball to a near by Blitzer. Even though that prevented my team from loosing the ball, I was unable to score before Halftime.

The second half went pretty much the same.

Results: Tie game all around! Score was 0-0, and Casualties were 2-2.

Tournament Points Earned: 1

Game 4 vs Halflings


Day 2 opens with The Halfling Master Chef stealing both of my Re-Rolls in both halves. I played the entire game without a single Re-Roll! So I tried to play conservatively in an attempt to mitigate any turnovers. In the end it turned out to be a sound strategy. The entire first half, I did not take any unnecessary actions.

However, in the second half, I felt a win was a nearly certain, so I focused more on hitting than scoring. I had kept track of my total casualties caused in the previous 3 games and thought that I might be near the top. On Turn 16, I went for it. I Blitzed, fouled, and threw every Block I could instead of scoring. In the end I passed every roll and was able to score the TD  anyway! At the end of the game my opponent only had 2 players on the pitch--1 Halfling, and 1 Treeman.

Results: My first tournament win! Final score was 2-0. I caused a lot of mayhem, killing 7 Halflings and a Treeman, while suffering no injuries.

Tournament Points Earned: 4

Game 5 vs Humans

[picture unavailable]

Final game of the tournament. I have faced this coach twice before. Once in a previous tournament, Goblin vs Goblin where I lost. Then a second time in league play with my Chaos Dwarves vs his Ogres where I eeked out a win.

The Human team had a Chainsaw Star Player. I tried to stay away from it and score as quickly as I could. Unfortunately I misjudged the speed of the Humans and my ball carrier got sacked by the chainsaw. Luckily, Ithica was only stunned and he was able to Dump Off the ball to a near by Blitzer. But surprisingly, after the Blitzer failed to catch the Dump Off, a Tomb Guardian caught the scattered ball. I was able to boldly march up the field for a turn 6 TD. Off went the chainsaw. The Human coach was unable to score in the remaining turns of the half.

In the second half, I kicked off having 3 more players than my opponent. The Humans keep the ball deep in the back field, hoping for an opening that never comes. I kept my opponent locked down but am unable to score again.

Results: The Falcons pull out another win at 1-0. They also kept up their killing spree and knocked off 5 Humans while only suffering 1 Casualty.

Tournament Points Earned: 4

Team Stats


Tournament roster with skill package and names for each player.

Goals For/Against: 5/5
Casualties For/Against: 24/9 (second and third place has 23 and 19)
Tournament Points: 10 (Out of a maximum 20; Winner had 17)

Final Thoughts

In addition to converting and painting up a team, I also put together a themed book/display case/carrying case. The following 2 images are the artwork I put together for the book.


This is the completed book, opened up as a display case with lights. This was placed at the side of the pitch on top of the dugout and functioned as the reserves box.


Another element I added was tea lights under the translucent figures.


So not only did I win the 'Eadsplitter Award for causing the most Casualties, but I also won the Flash Git Award (best appearance)! But I had to choose which to officially win because they only give out 1 award per person.


A unique feature of this tournament was 3 tournament specific Special Play cards. Every coach had a set and each could be played once per game.


One of the give away items was this cool poker chip with Blood Bowl themed club logo adorning it (and the Special Play cards). What is especially cool is that I designed the logo.

I had such a great time at this tournament and I look forward to next year.

Tuesday, August 26, 2014

40k BatRep – Space Marines vs Tau 1750 pts

A 3 on 1 game! Deathbot invited two of his neighbor friends to play.

Jay and Dom live next door. They came over to visit during Deathbot's and my last game. They showed enough interest in the game, I decided I would endeavor to play 40K with a 6, 9, and 11 year old! To my surprise, all three kidos stuck it out for 6 hours!!

At first we were going to play 2-on-2 (the youngest on my side), but after Jay and Dom arrived, the three compatriots decided to "gang up" on me.

They agreed to split up Deathbot's Army between them. I pulled Deathbot aside and suggested he let his friends choose first--He happily agreed!. After a 15 minute Q&A about each unit/vehicle, it was settled: Jay took a Tac squad and the Lord Commissar/Command Squad, while Dom took both IG Vet Squads. Deathbot controlled everything else with the understanding he would lend a unit to Jay or Dom if they lost one of theirs.

ARMY LISTS

Space Marines with Imperial Guard allies

This time Deathbot wanted to use his Scout Marines. I tweaked his list around to accommodate the addition.
  • Terminator Captain (120): Iron Halo; Storm Bolter; Power Sword
  • Dreadnought A (120): Searchlight; Smoke Launchers; Assault Cannon; Power Fist; Storm Bolter
  • Dreadnought B (100): Searchlight; Smoke Launchers; Multi-melta; Power Fist; Storm Bolter
  • Terminator Squad (210): Sergeant; Storm Bolter x4; Power Fist x4; Power Sword; Hvy Flamer
  • Tactical Squad A (190): Sergeant; Bolt Pistol x10; Bolter x7; Chain Sword; Flamer; Hvy Bolter; Rhino
  • Tactical Squad B (190): Sergeant; Bolt Pistol x10; Bolter x7; Chain Sword; Flamer; Hvy Bolter; Rhino
  • Scout Squad (55): Sergeant; Bolt Pistol x5; Chain Sword x5
  • Predator (150): Searchlight; Smoke Launchers; Extra Armor; TL Lascannon; Lascannon x2 (side).
  • Lord Commissar (80): Carapace Armor; Bolt Pistol; CCW, Melta Bombs
  • IG Command Squad (180): Company Commander; Flack Armor; CCW x4; Lasgun x3; Medi=Pack; Regimental Standard; Vox Caster; Plasma Gun; Chimera
  • IG Veteran Squad A (180): Sergeant; Flack Armor; Melta bombs x10; CCW x8; Lasgun x7; Laspistol; Autocannon (HWT); Flamer; Grenade Launcher; Demolitions; Chimera
  • IG Veteran Squad B (187):  Sergeant; Carapace Armor; CCW x8; Shotgun x5; Laspistol; Grenade Launcher x2; Lascannon (HWT); Grenadiers; Chimera
Total Points: 1762

Tau Empire

I did not change my list from the previous game.
  • XV8 Commander + Bodyguards (361): Fusion Blaster x3; Missile Pod x3; Plasma Rifle x3; Target Lock; Shield Drone x6
  • Cadre Fire Blade (84): Pulse Rifle; Shield Drone x2
  • XV8 Crisis Team  (273): Fusion Blaster x3; Missile Pod x3; Plasma Rifle x3; Shield Drone x6
  • Stealth Team (170): Shas'vre; Fusion Blaster; Markerlight & Target Lock; Burst Cannon x4
  • Fire Warrior Team (205): Shas'ui; Pulse Rifle x10; Devilfish w/ Disruption Pod
  • Drone Sentry Turret Team (220): TL Burst Canons x4
  • Kroot Carnivore Squad (260): Kroot Shaper; Kroot Rifle x20; Kroot Hounds x10; Krootox/Kroot Gun x3
  • Hammerhead (177): TL Smart Missile System; Railgun w/ Solid & Submunitions; Disruption Pod; Seeker Missiles x2
Total Points: 1750

SETUP

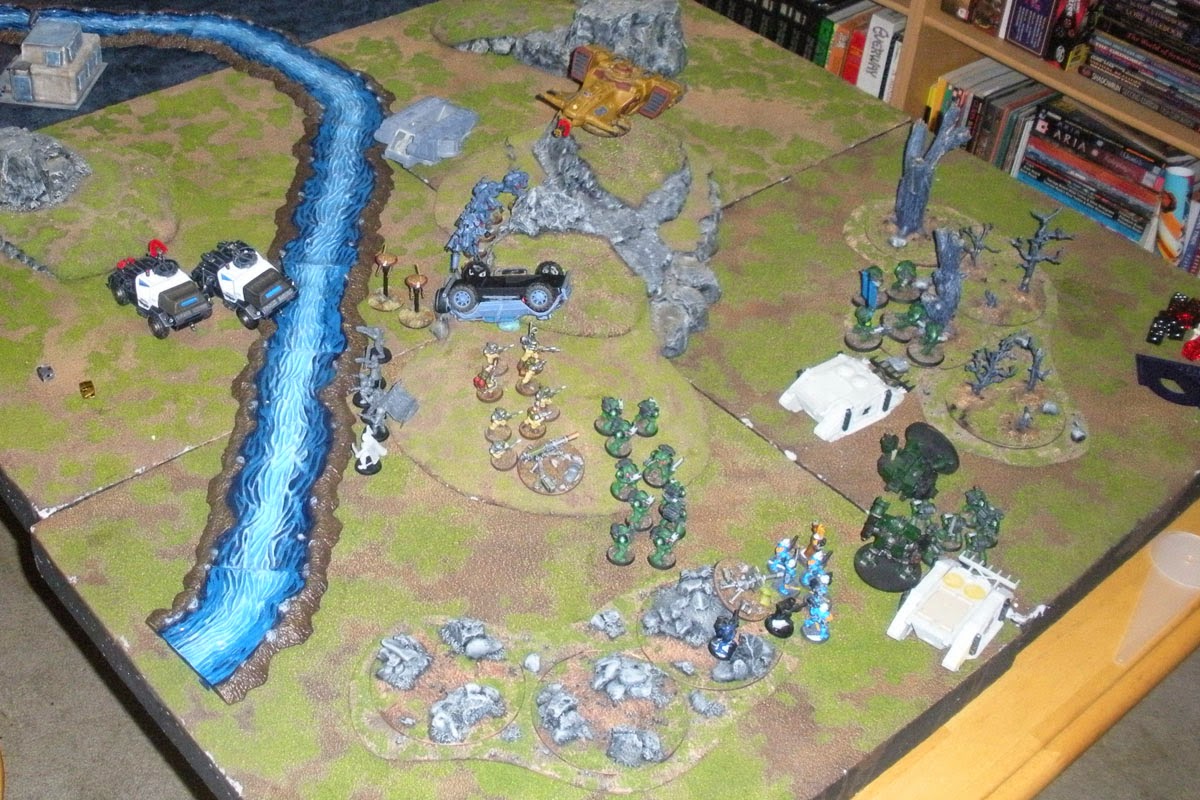
Deploy Zones tinted in red.

We rolled for the mission: Annihilation/Spearhead. I like to stand next to the book shelves (far side of table), plus there is much more "wiggle" room for the three boys on the other side. So I chose sides, letting them place and go first.

This was very much a learning game, but I took plenty of pictures anyway.

TURN 1


Jay and Dom chose to deploy already disembarked from their vehicles. Deathbot chose not to, kept all Deep Striking models in Reserves, and Infiltrated his Scout Marines on top of the tall red building.

I deployed evenly across my table edge, Infiltrating the Kroot, and keeping all my Deep Strike troops in Reserves.

No casualties this turn.

TURN 2


In the middle of the board, all three Chimeras and the Predator fired at my Fire Warriors. To my left, Team Deathbot focused everything else at my Kroot. Surprisingly, I took far less casualties than I expected.

My Hammerhead trashed the Scout Marines, and my pounded a Tac Squad.

TURN 3


The boys decided to bring more forces against my Kroot. They placed the Terminators in assault range and diverted the Commisar, IG Command Squad and a Chimera. I lost 10 Kroot that turn.

My Fire Warriors did nothering. But my Kroot destroyed a Dreadnought. Then my Commander and Bodyguards arrived, disarming a Chimera.

TURN 4


The hail of fire raining on my Kroot finally burned them all out. The kids were ecstatic with their victory!

Unfortunately for them, my Hammerhead had not missed all day. Predator destroyed. Another bout of bad luck for the boys came when I tried to place my Stealth Suits in the middle of their main force. The Suits scattered to the back side of the hill, giving them full view of a Chimera side armor. Dead Tank.

TURN 5


After loosing 2 tanks last turn, the boy's stopped working together--They each chose what to do independently without consultation with their team. I strongly suggested they do not split up their force as I still had two units in Reserve. But they did not take my advice.

Dom went after my Commander and Bodyguards, Jay stuck it out with my Stealth Suits, and Deathbot made a dash towards my Fire Warriors. They caused zero damage.

I tried to place my Crisis Suit Team in front of the on coming Space Marines in an effort to protect my Fire Warriors and Fire Blade. I scattered off the table. The kids were able to place the unit. This made them laugh out loud. They placed the unit to the far side of my Fire Warriors.

The last Scout Marine was hiding in the grey church. 28 Pulse Rifle shots failed to take him out 2 turns in a row! The boys conveniently placed my Crisis Suits right next to him. Dead Scout.

TURN 6


By the time turn 6 started it was pretty late. Everyone was tired and loosing focus. The boys rushed through their turn, knowing they lost.

Things were getting a bit tedious for me in the last two rounds. 40K isn't the most complex game, but at 1750 points and wrangling 3 young boys, my patience was definitely tested! But in the end, fun was had by all! That's what counts, right?

Friday, August 15, 2014

40k BatRep - Space Marines vs Tau 1750pts

Deathbot and I played another 40k game a couple weeks back. I present you 30+ images representing the battle.

Once again, I have sat on a battle report for about a month before posting it. At least I took plenty of pictures!

ARMY LISTS


Deathbot wanted more IG/AM allies this go around. I provided him with a squad of my Adeptus Arbites and a couple 'counts as' Chimeras.

  • Terminator Captain (120): Iron Halo; Storm Bolter; Power Sword
  • Dreadnought A (120): Searchlight; Smoke Launchers; Assault Cannon; Power Fist; Storm Bolter
  • Dreadnought B (100): Searchlight; Smoke Launchers; Multi-melta; Power Fist; Storm Bolter
  • Terminator Squad (210): Sergeant; Storm Bolter x4; Power Fist x4; Power Sword; Hvy Flamer
  • Tactical Squad A (190): Sergeant; Bolt Pistol x10; Bolter x7; Chain Sword; Flamer; Hvy Bolter; Rhino
  • Tactical Squad B (190): Sergeant; Bolt Pistol x10; Bolter x7; Chain Sword; Flamer; Hvy Bolter; Rhino
  • Assault Squad (180): Sergeant; Bolt Pistol x10; Chain Sword x8; Flamer x2
  • Predator (150): Searchlight; Smoke Launchers; Extra Armor; TL Lascannon; Lascannon x2 (side).
  • Imperial Bastion (75): Emplaced Hvy Bolters (x4)
  • Lord Commissar (75): Flack Armor; Bolt Pistol; CCW, Melta Bombs
  • IG Veteran Squad A * (125): Sergeant; Melta bombs x10; CCW x10; Lasgun x7; Laspistol; Flamer; Grenade Launcher; Demolitions; Chimera
  • IG Veteran Squad B (125): Sergeant; Carapace Armor x10; CCW x10; Shotgun x8; Laspistol; Grenade Launcher x2; Grenadiers; Chimera

Total Points: 1745

* As we were setting up, Deathbot wanted to use one of his new IG Heavy Weapon bases given to him by Adeptus-B. I replaced 2 of the members of the squad with a Lascannon Heavy Weapon Team. The point cost does not reflect this change.


I changed up my force a bit using my recently assembled Kroot and a never before used scratch built Drone Sentry Turret Team.

  • XV8 Commander + Bodyguards (361): Fusion Blaster x3; Missile Pod x3; Plasma Rifle x3; Target Lock; Shield Drone x6
  • Cadre Fire Blade (84): Pulse Rifle; Shield Drone x2
  • XV8 Crisis Team  (273): Fusion Blaster x3; Missile Pod x3; Plasma Rifle x3; Shield Drone x6
  • Stealth Team (170): Shas'vre; Fusion Blaster; Markerlight & Target Lock; Burst Cannon x4
  • Fire Warrior Team (204): Shas'ui; Pulse Rifle x10; Devilfish w/ Disruption Pod
  • Drone Sentry Turret Team (220): TL Burst Canons x4
  • Kroot Carnivore Squad (260): Kroot Shaper; Kroot Rifle x20; Kroot Hounds x10; Krootox/Kroot Gun x3
  • Hammerhead (177): TL Smart Missile System; Railgun w/ Solid & Submunitions; Disruption Pod; Seeker Missiles x2

Total Points: 1749

SET UP


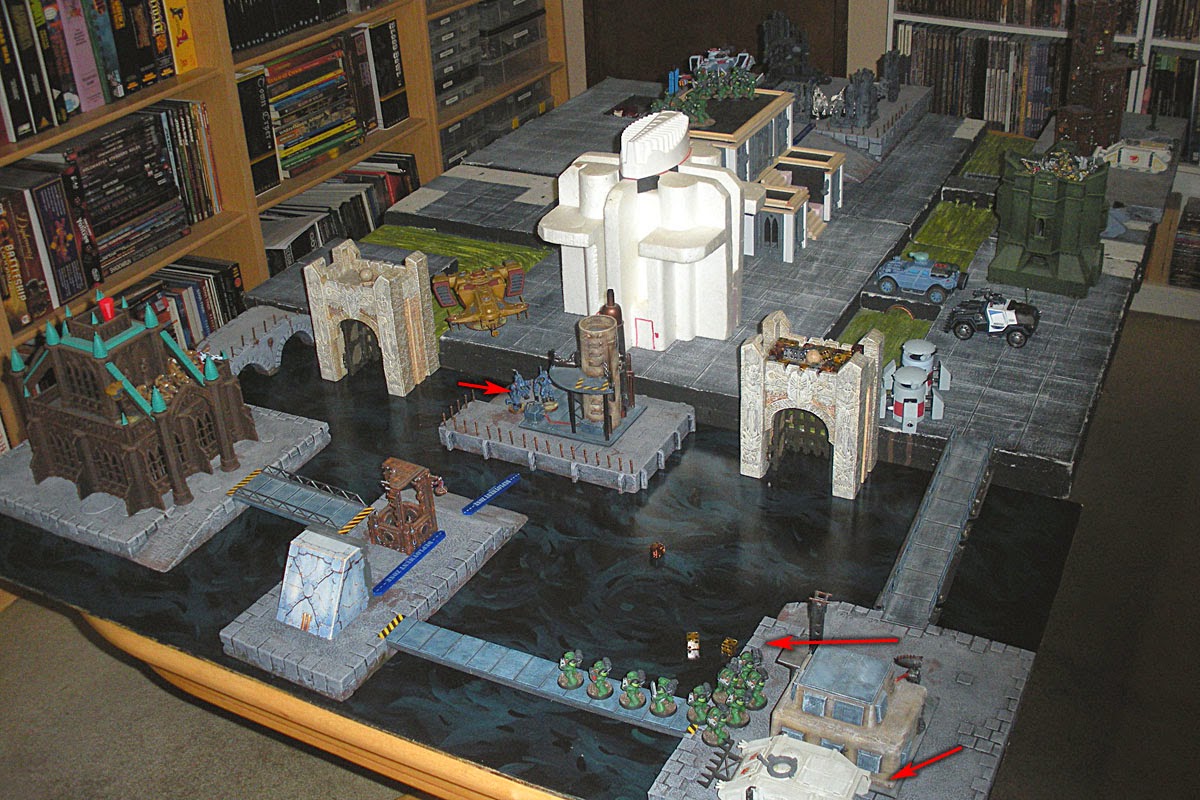
The terrain for this game is a small city with canals flowing into a larger river/canal.  I have placed "islands" connected by bridges along the water edge.

The mission for this game was "Capture and Control" with a "Dawn of War" deployment. We both placed our "home base" objectives in opposite corners from each other.

Deathbot won initiative and deployed his IG HQ and 2 Troops, placing his commander with vet squad A. Both Chimeras were placed about 1/3 of the way from his left table edge.

I placed my Fireblade and Fire Warriors on the building roof occupied by my objective. The team's Devilfish was placed behind a building to lend fire support for approaching enemies. My Kroot infiltrated into the large grey church to my left of the board.

We both kept our deep strike capable units in reserve.

TURN 1


I siezed the initiative. The only unit left that was not in reserve was my Hammerhead. I moved it flat out to take cover behind the grey church. My Kroot fired at a Dreadnought

Deathbot brought on 2 Tac squads in Rhinos to his left then both Dreads and the Predator to his right. Before turn 2 started he realized his mistake by not placing a Tac squad by his Objective. I allowed him to redeploy a Rhino and Tac squad  to his far right.

TURN 2


My Kroot continued to fire upon the Dreadnought, again to no effect.

Deathbot's entire right flank fired upon the Grey church, blowing it to smitherenes, killing about 6 Kroot Hounds. Deathbot did not advance, but maneuvered his Chimeras closer to the Bastion, disembarked both Tac squads, and laterally moved a Dreadnought.

TURN 3

We finally see some action this turn.


A disastrous Deep Strike Scatter caused the loss of 3 out of 5 Stealth Suits.


More Deep Strike! Deathbot's Assault Squad, Terminator Squad, and Terminator Captain land on the central building's roof. My Drone Sentry Turret land with open view to both Chimera's sides while my Crisis Team lands behind the central building.

Deathbot advances both Dreads and both Chimeras. I moved the Devilfish to firing range of an advancing Tac Squad.


From this angle you can also see the advancing Tac Squad and my Stealth Team move to (dry) cover.


Vet Squad A and Lord Commissar arrive at the roof of the Bastion.

My losses to this point. Deathbot has lost zero models!

TURN 4


The advancing Tac Squad, under heavy fire, manages to take out the last two Stealth Suits.


The Kroot finally took out a Dreadnought arm, but have suffered significant losses by this point.


The Hammerhead still remains in deep cover, only letting loose its SMS.


Both Dreads advance as the Kroot hail of bullets switch targets and crack open the Predator.


This Tac Squad covers its Objective while firing at the Kroot, causing them to rout.

Not pictured is the exchange of fire between Deathbot's units on the roof of the central building and my unit behind it. I believe a couple Assault Marines and Shield Drones were the only casualties.

TURN 5


The Assault Marines charge the Crisis Team. I don't recall where the losses came from (last turn's shooting and this turn's charge) but in total 6 Shield Drones, and 4 Marines are lost.

I believe the Hammerhead fired at the Assault Squad just before the charged.


This Tac Squad continues to advance under heavy fire.


Kroot in full retreat.


The kill ratio has finally tipped to the Tau's favor.

TURN 6


My Commander and bodyguards finally show up on turn 6!!!! What?!? That can't be. Somehow we played an extra turn and forgot to count it. We had to stop a number of times and played over the course of two days, so I am not surprised that this happened.

We played on anyway. My Command Squad let lose a barrage of white hot energy and missiles, completely vaporizing the Terminator Squad.


Deatbot's two Dreadnoughts make it across the river, advancing towards the Hammerhead while the Kroot run for their lives.


This Tac Squad is almost whittled away, reduced to two marines.


The Drone Sentry Turrets blew up one of the Chimeras and taking all but two members of Vet Squad B. The other Chimera, now empty, tries to get behind the Devilfish.


Things are not looking good for Deathbot!

TURN 7


The Dreadnoughts move closer to the Hammerhead, hoping to crush it with their Power Fists. The Tau's Commander and Bodyguards move to cover and a perfect position to exact alien terror on the advancing Dreads.

The remaining Chimera swings around the corner of the Styrofoam building.


The Devilfish spins around to the flank of the 2-man Tac Squad lending its firepower to the already overwhelming pulse rifle storm from the Firewarrior Team, killing them both handily.

Before we moved to the Assault Phase of Turn 7, Deathbot and I decided to call it a game. We both held our objectives and had little chance (me) to no chance (Deathbot) to deny/take the other players objective.

The game ends a tie. Deathbot is getting the hang of the game and has started to make some good decisions.

Again another fun day (or two) at the Zorcon Household. In the next BatRep, two neighborhood friends of Deathbot join the fray in a three-on-one battle!