Jay and Dom live next door. They came over to visit during Deathbot's and my last game. They showed enough interest in the game, I decided I would endeavor to play 40K with a 6, 9, and 11 year old! To my surprise, all three kidos stuck it out for 6 hours!!
At first we were going to play 2-on-2 (the youngest on my side), but after Jay and Dom arrived, the three compatriots decided to "gang up" on me.
They agreed to split up Deathbot's Army between them. I pulled Deathbot aside and suggested he let his friends choose first--He happily agreed!. After a 15 minute Q&A about each unit/vehicle, it was settled: Jay took a Tac squad and the Lord Commissar/Command Squad, while Dom took both IG Vet Squads. Deathbot controlled everything else with the understanding he would lend a unit to Jay or Dom if they lost one of theirs.
ARMY LISTS
 |
| Space Marines with Imperial Guard allies |
This time Deathbot wanted to use his Scout Marines. I tweaked his list around to accommodate the addition.
- Terminator Captain (120): Iron Halo; Storm Bolter; Power Sword
- Dreadnought A (120): Searchlight; Smoke Launchers; Assault Cannon; Power Fist; Storm Bolter
- Dreadnought B (100): Searchlight; Smoke Launchers; Multi-melta; Power Fist; Storm Bolter
- Terminator Squad (210): Sergeant; Storm Bolter x4; Power Fist x4; Power Sword; Hvy Flamer
- Tactical Squad A (190): Sergeant; Bolt Pistol x10; Bolter x7; Chain Sword; Flamer; Hvy Bolter; Rhino
- Tactical Squad B (190): Sergeant; Bolt Pistol x10; Bolter x7; Chain Sword; Flamer; Hvy Bolter; Rhino
- Scout Squad (55): Sergeant; Bolt Pistol x5; Chain Sword x5
- Predator (150): Searchlight; Smoke Launchers; Extra Armor; TL Lascannon; Lascannon x2 (side).
- Lord Commissar (80): Carapace Armor; Bolt Pistol; CCW, Melta Bombs
- IG Command Squad (180): Company Commander; Flack Armor; CCW x4; Lasgun x3; Medi=Pack; Regimental Standard; Vox Caster; Plasma Gun; Chimera
- IG Veteran Squad A (180): Sergeant; Flack Armor; Melta bombs x10; CCW x8; Lasgun x7; Laspistol; Autocannon (HWT); Flamer; Grenade Launcher; Demolitions; Chimera
- IG Veteran Squad B (187): Sergeant; Carapace Armor; CCW x8; Shotgun x5; Laspistol; Grenade Launcher x2; Lascannon (HWT); Grenadiers; Chimera
 |
| Tau Empire |
I did not change my list from the previous game.
- XV8 Commander + Bodyguards (361): Fusion Blaster x3; Missile Pod x3; Plasma Rifle x3; Target Lock; Shield Drone x6
- Cadre Fire Blade (84): Pulse Rifle; Shield Drone x2
- XV8 Crisis Team (273): Fusion Blaster x3; Missile Pod x3; Plasma Rifle x3; Shield Drone x6
- Stealth Team (170): Shas'vre; Fusion Blaster; Markerlight & Target Lock; Burst Cannon x4
- Fire Warrior Team (205): Shas'ui; Pulse Rifle x10; Devilfish w/ Disruption Pod
- Drone Sentry Turret Team (220): TL Burst Canons x4
- Kroot Carnivore Squad (260): Kroot Shaper; Kroot Rifle x20; Kroot Hounds x10; Krootox/Kroot Gun x3
- Hammerhead (177): TL Smart Missile System; Railgun w/ Solid & Submunitions; Disruption Pod; Seeker Missiles x2
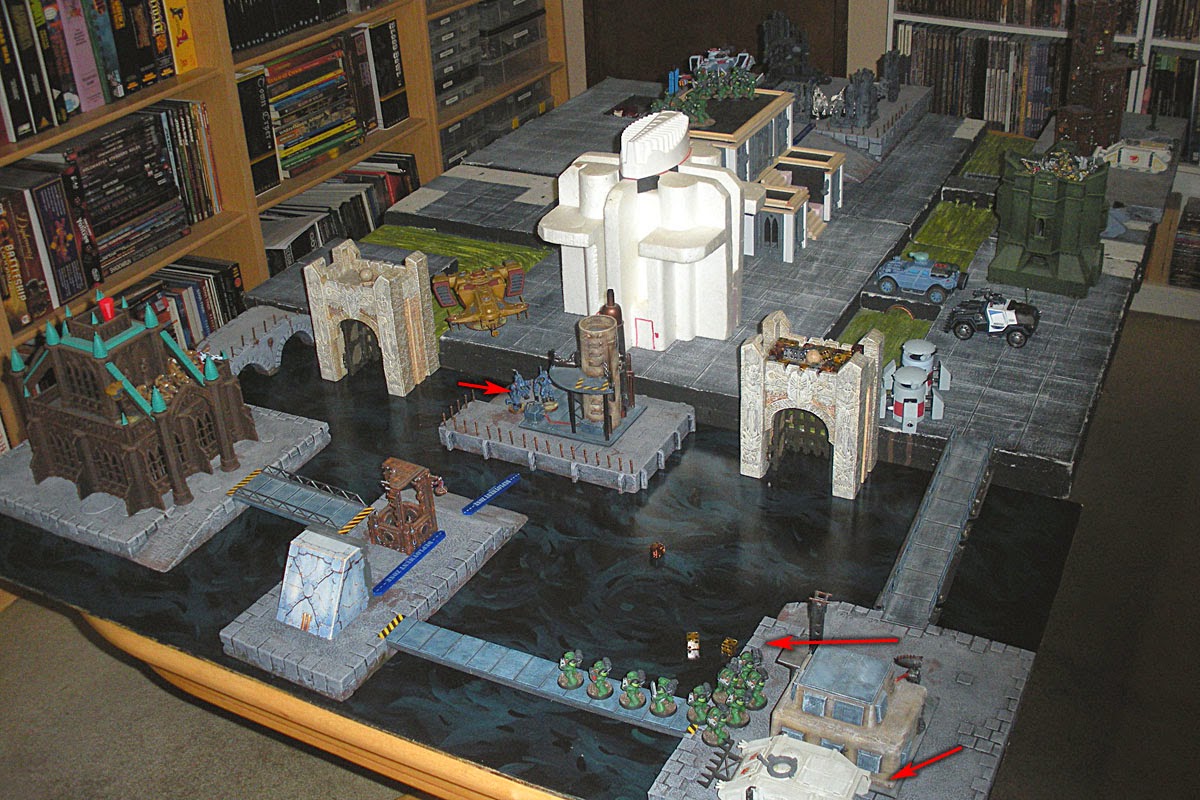
SETUP
 |
| Deploy Zones tinted in red. |
We rolled for the mission: Annihilation/Spearhead. I like to stand next to the book shelves (far side of table), plus there is much more "wiggle" room for the three boys on the other side. So I chose sides, letting them place and go first.
This was very much a learning game, but I took plenty of pictures anyway.
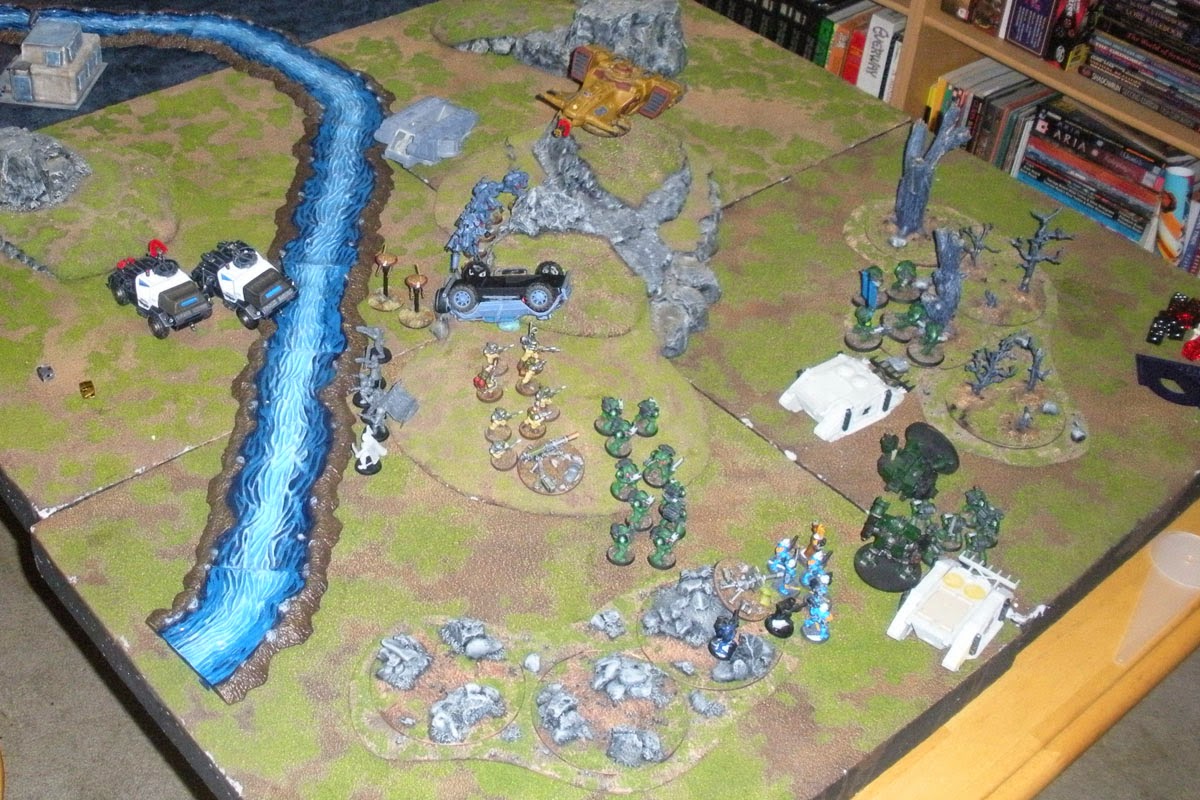
TURN 1


Jay and Dom chose to deploy already disembarked from their vehicles. Deathbot chose not to, kept all Deep Striking models in Reserves, and Infiltrated his Scout Marines on top of the tall red building.
I deployed evenly across my table edge, Infiltrating the Kroot, and keeping all my Deep Strike troops in Reserves.
No casualties this turn.
TURN 2


In the middle of the board, all three Chimeras and the Predator fired at my Fire Warriors. To my left, Team Deathbot focused everything else at my Kroot. Surprisingly, I took far less casualties than I expected.
My Hammerhead trashed the Scout Marines, and my pounded a Tac Squad.
TURN 3


The boys decided to bring more forces against my Kroot. They placed the Terminators in assault range and diverted the Commisar, IG Command Squad and a Chimera. I lost 10 Kroot that turn.
My Fire Warriors did nothering. But my Kroot destroyed a Dreadnought. Then my Commander and Bodyguards arrived, disarming a Chimera.
TURN 4


The hail of fire raining on my Kroot finally burned them all out. The kids were ecstatic with their victory!
Unfortunately for them, my Hammerhead had not missed all day. Predator destroyed. Another bout of bad luck for the boys came when I tried to place my Stealth Suits in the middle of their main force. The Suits scattered to the back side of the hill, giving them full view of a Chimera side armor. Dead Tank.
TURN 5


After loosing 2 tanks last turn, the boy's stopped working together--They each chose what to do independently without consultation with their team. I strongly suggested they do not split up their force as I still had two units in Reserve. But they did not take my advice.
Dom went after my Commander and Bodyguards, Jay stuck it out with my Stealth Suits, and Deathbot made a dash towards my Fire Warriors. They caused zero damage.
I tried to place my Crisis Suit Team in front of the on coming Space Marines in an effort to protect my Fire Warriors and Fire Blade. I scattered off the table. The kids were able to place the unit. This made them laugh out loud. They placed the unit to the far side of my Fire Warriors.
The last Scout Marine was hiding in the grey church. 28 Pulse Rifle shots failed to take him out 2 turns in a row! The boys conveniently placed my Crisis Suits right next to him. Dead Scout.
TURN 6


Things were getting a bit tedious for me in the last two rounds. 40K isn't the most complex game, but at 1750 points and wrangling 3 young boys, my patience was definitely tested! But in the end, fun was had by all! That's what counts, right?